ARG Contact Form 7 Multi Step Documentation
If you have any questions that are beyond the scope of this help file, please feel free to email via our user page contact form here.
Table of Contents
- Files
- Installation
- Setting up a Multi Step Form
- Show an Answer From a Previous Step or create a custom Form Review Step at the end of the multi-step
- Customize the text of the Next/Previous Buttons on the every step
- Demo CodeNew
- Wizard Location
- Wizard General Settings
- Wizard Styles
- Validation Error Messages
- How ToNew
Files
Download the plugin from CodeCanyon:
After you’ve purchased this plugin, you’ll need to access your codecanyon account and download the the ZIP archive (ARG Contact Form 7 Multistep v1.0.zip) which contains the plugin installable folder (contains the plugin archive arg-contact-form-7-multistep.zip) and the documentation folder (contains the plugin documentation).
Installation
Below you can find the steps you need to follow to install the plugin:
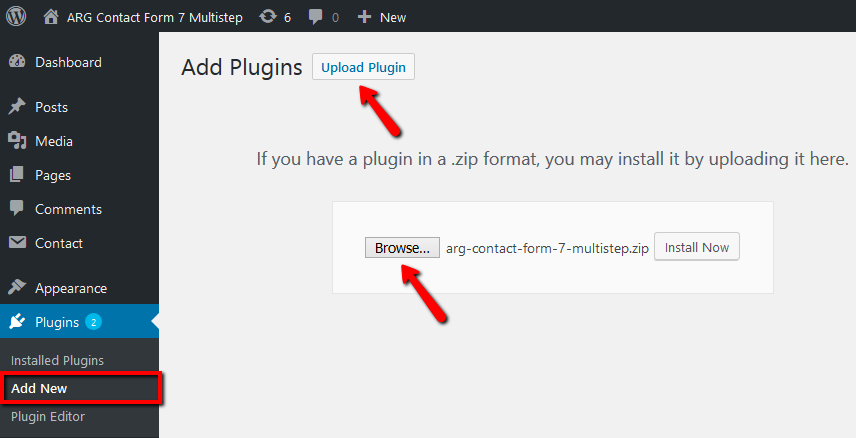
- Save a copy of the plugin on your computer from codecanyon
- Login to your WordPress dashboard using an admin account
- Navigate to Plugins > Add new > Upload plugin
- Click on Browse and browse the zipped file you’ve downloaded from codecanyon in first step (contact-form-7-multistep.zip) and press Install now button
- Once the file is uploaded, don’t forget to activate the plugin
Setting up a Multi Step Form
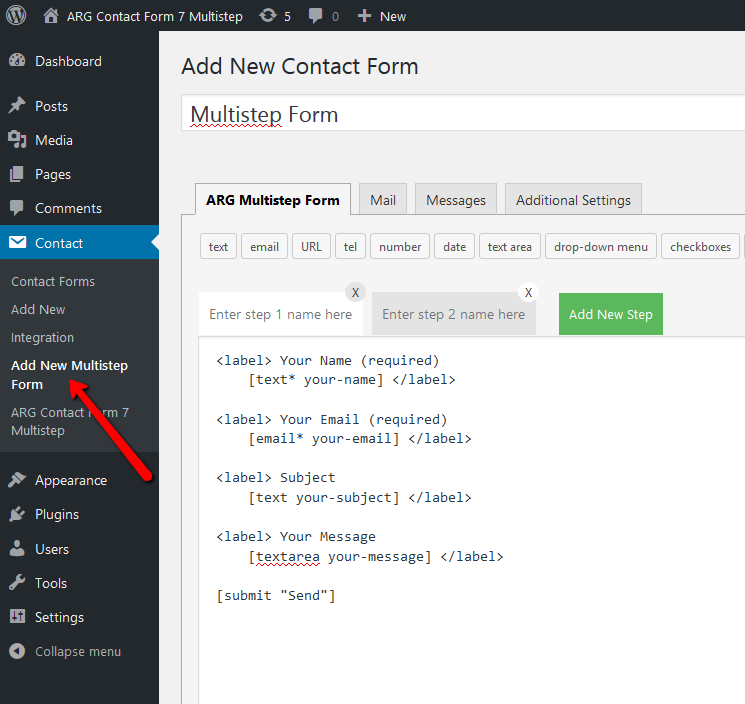
In order to create a new multistep form navigate to Dashboard > Contact > and click on the “Add New Multistep Form” button:
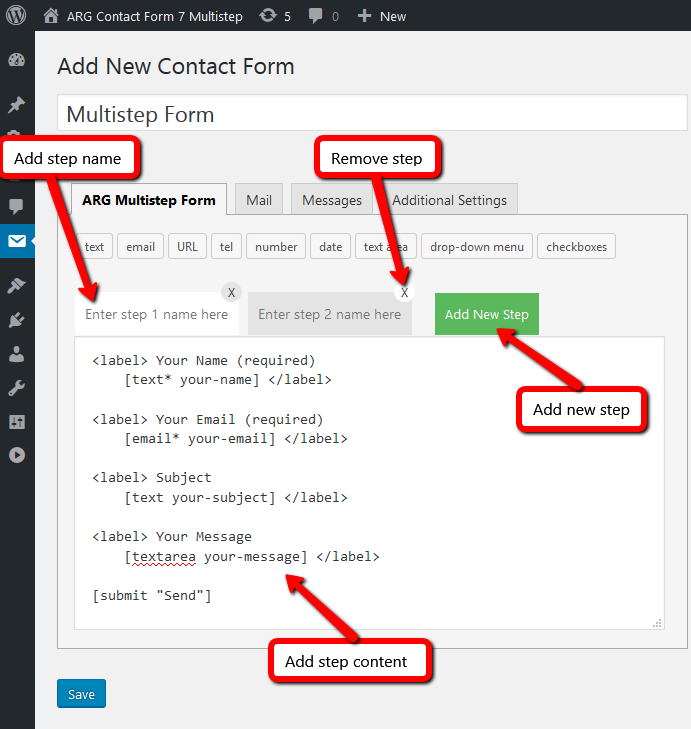
After the “Add New Multistep Form” button was clicked, define steps names and content (or change steps names and content if they already exists). Also there is the posibility to add new steps or to delete the existing ones:
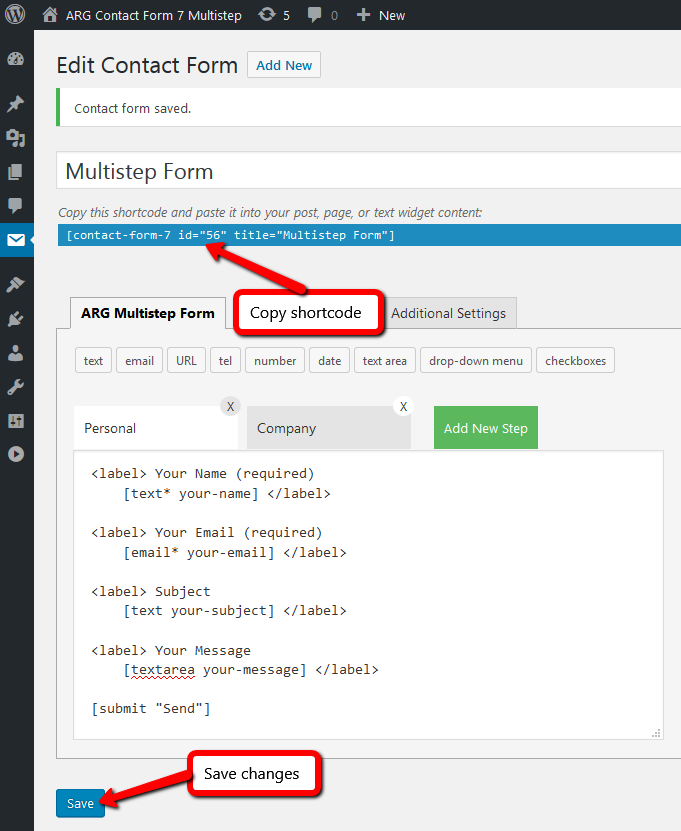
The last and the most important step is to save the changes from time to time because all unsaved entries will be lost. After save, don’t forget to copy and paste the generated shortcode into your post, page, or text widget content:
Well, that’s it. We’ve tried to make this process as simple as possible. Enjoy!
Show an Answer From a Previous Step or create a custom Form Review Step at the end of the multi-step
In order use the new form-tag generator navigate to Dashboard > Contact > Contact Forms and open to edit a multi-step form. Here you will find the new form-tag generator named “answer”:
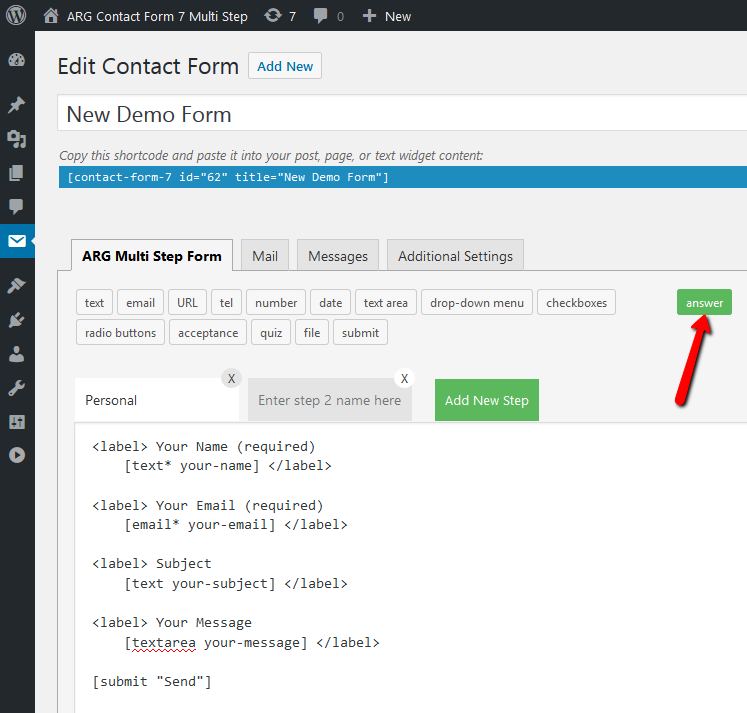
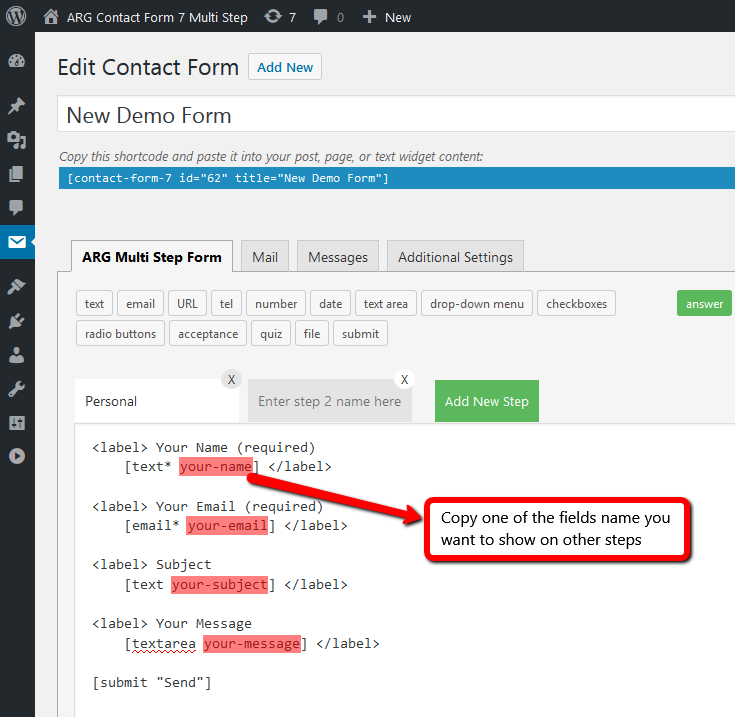
To display the info that users enter on a previous step, just navigate to that step and copy the field name you need (usually the field name is the second text, all fields names are highlighted in the below screenshot):
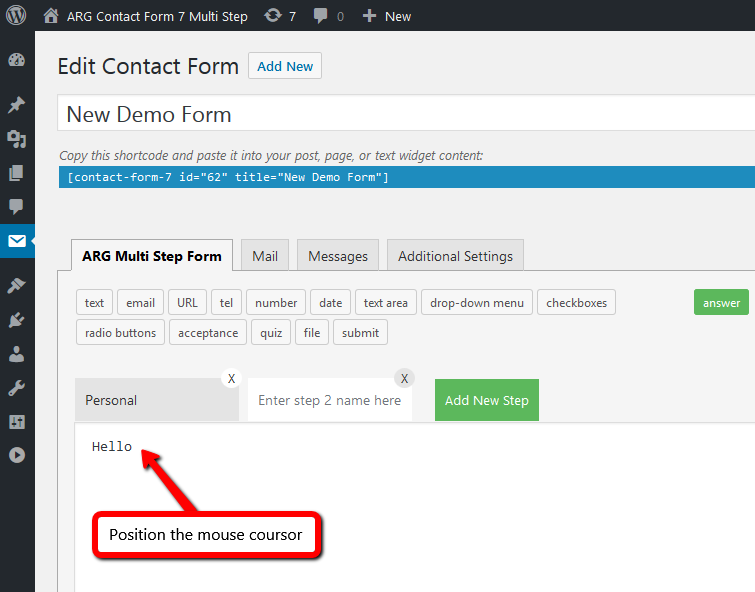
After the field name was copied, navigate to the step you want to display that info. Then, into that step content, position the mouse coursor where you want to show the info:
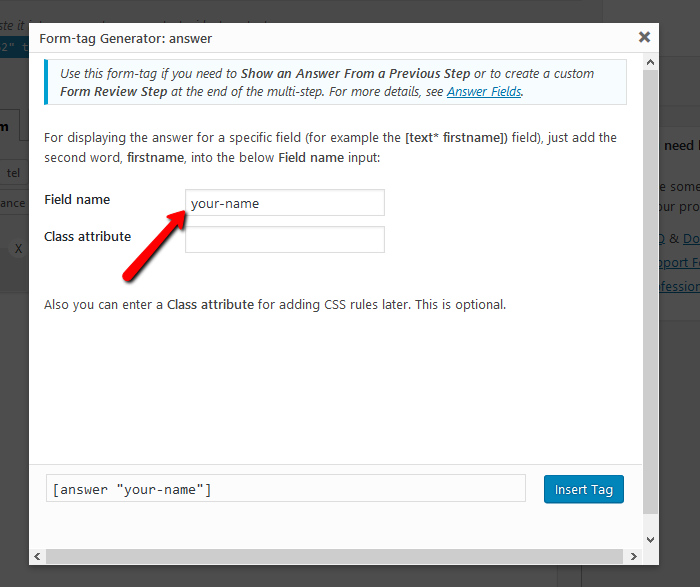
Then click on the form-tag answer and paste the copied field name into the Field name input:
After the form-tag answer was inserted, the step content should look like this:
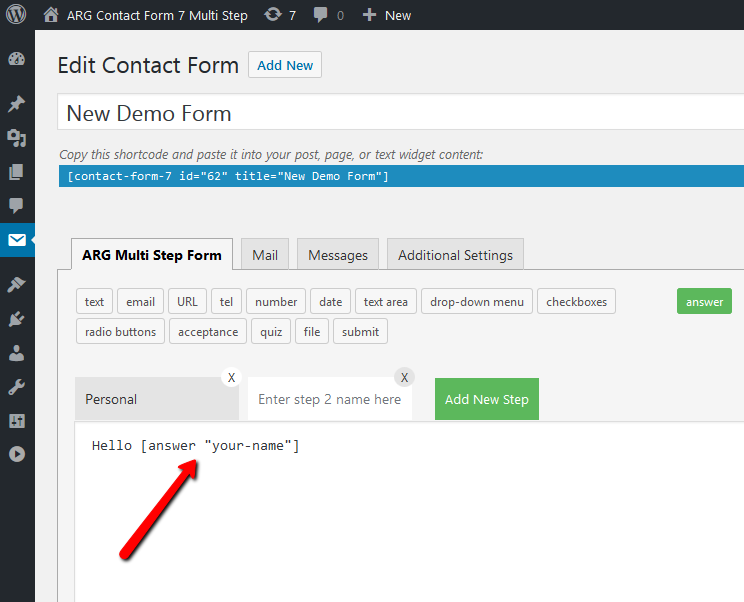
That’s it, don’t forget to save the changes.
Customize the text of the Next and Previous Buttons on the every step
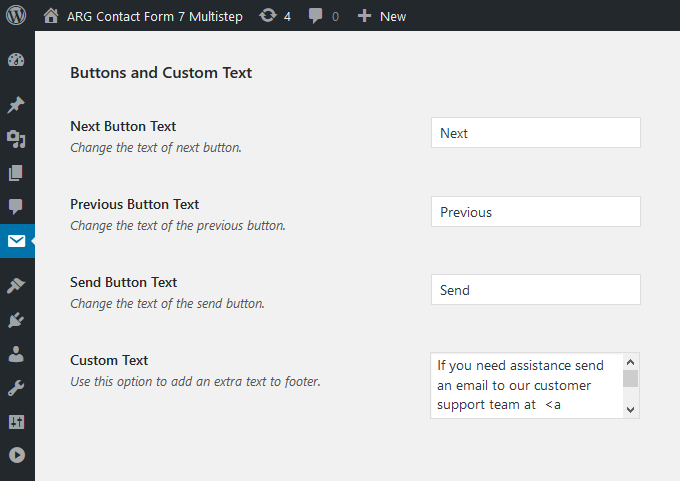
First, navigate to Wp Admin Dashboard > Contact > ARG Contact Form 7 Multistep. Under the General Settings tab define the text for the navigation buttons (previous, next, send) to your needs.

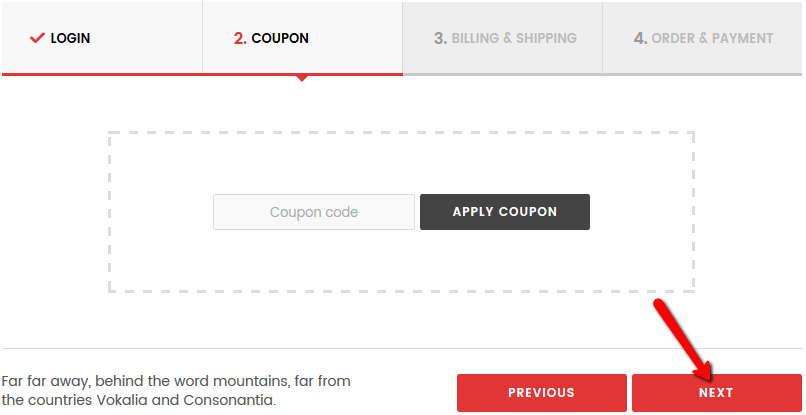
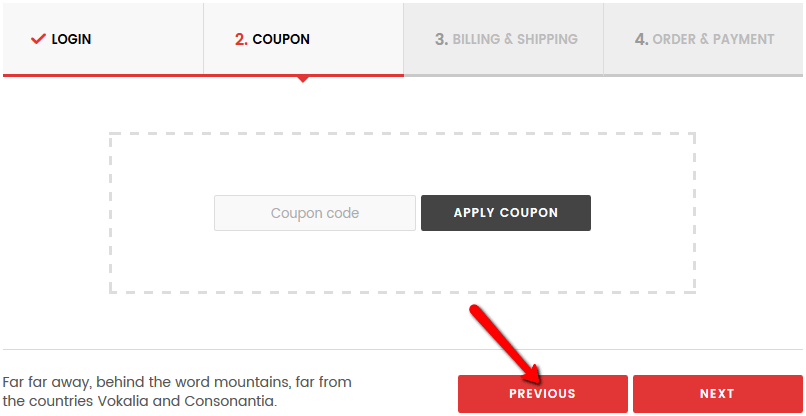
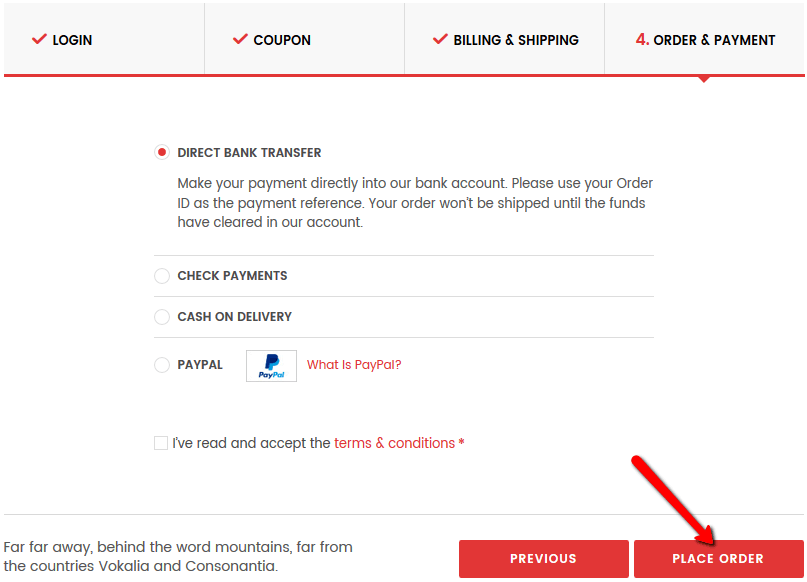
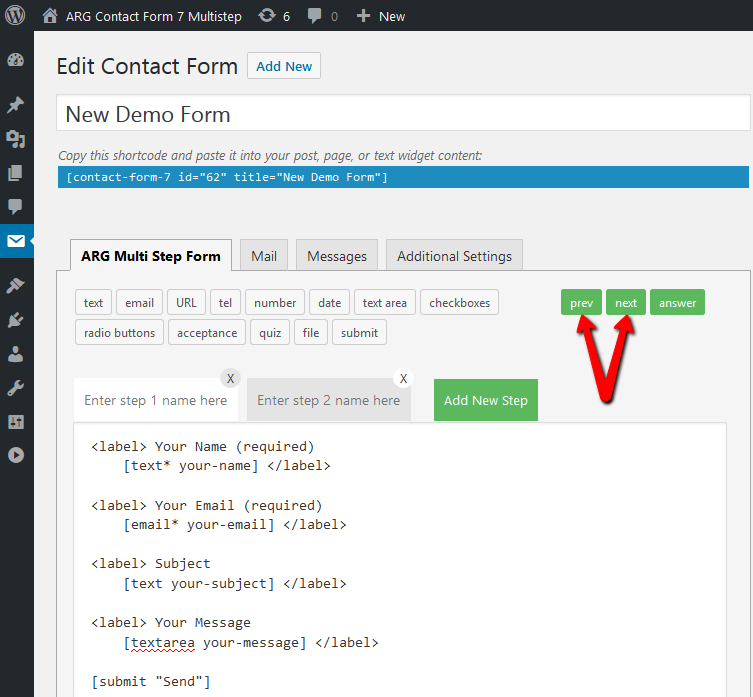
Then, in order to customize the text of the navigation buttons defined above on every step, use the new form-tags generators. Navigate to Dashboard > Contact > Contact Forms and open to edit a multi-step form. Here you will find the new form-tags generators named “prev” and “next”:
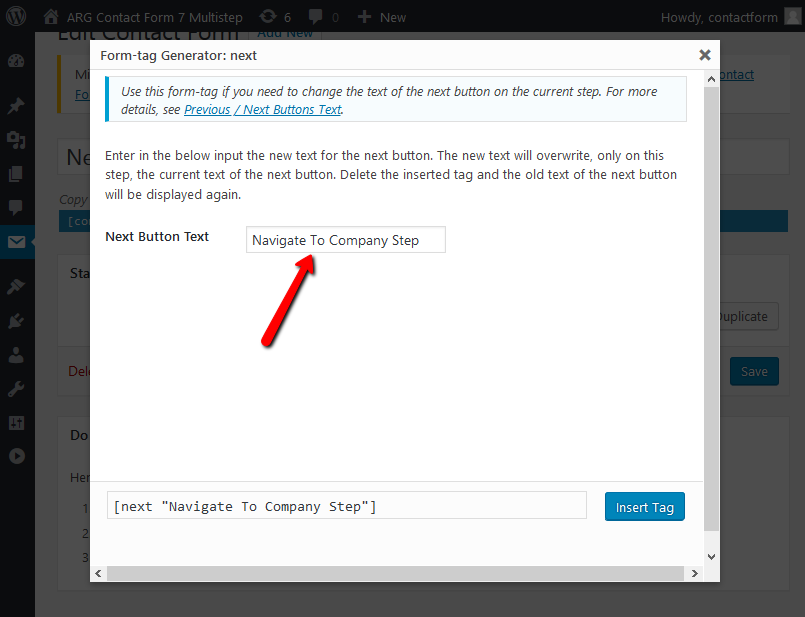
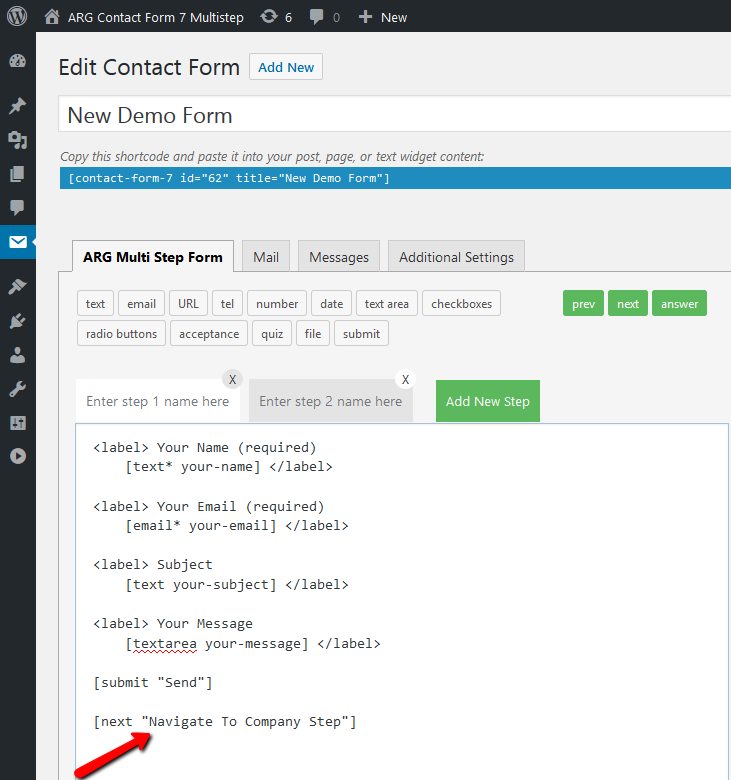
That’s it, don’t forget to save the changes.
Demo Code
Below is the entire html demo code of step one:
|
1 2 3 4 5 6 7 8 9 10 11 12 13 14 15 16 17 18 19 20 21 22 23 |
<h5 class="cfstep-name">About You</h5> <div class="cfleft-right-fields"> <div class="form-group"> <div class="form-label">First Name <abbr class="cfrequired" title="required">*</abbr></div> [text* firstname] </div> <div class="form-group"> <div class="form-label">Last Name <abbr class="cfrequired" title="required">*</abbr></div> [text* prename] </div> </div> <div class="form-group"> <div class="form-label">Phone <abbr class="cfrequired" title="required">*</abbr></div> [tel* tel-161] </div> <div class="form-group"> <div class="form-label">Email <abbr class="cfrequired" title="required">*</abbr></div> [email* email-128] </div> |
Use Left/Right Inputs block of code if you want to display two inputs in one line or Full Width Inputs block of code to display them one per line:
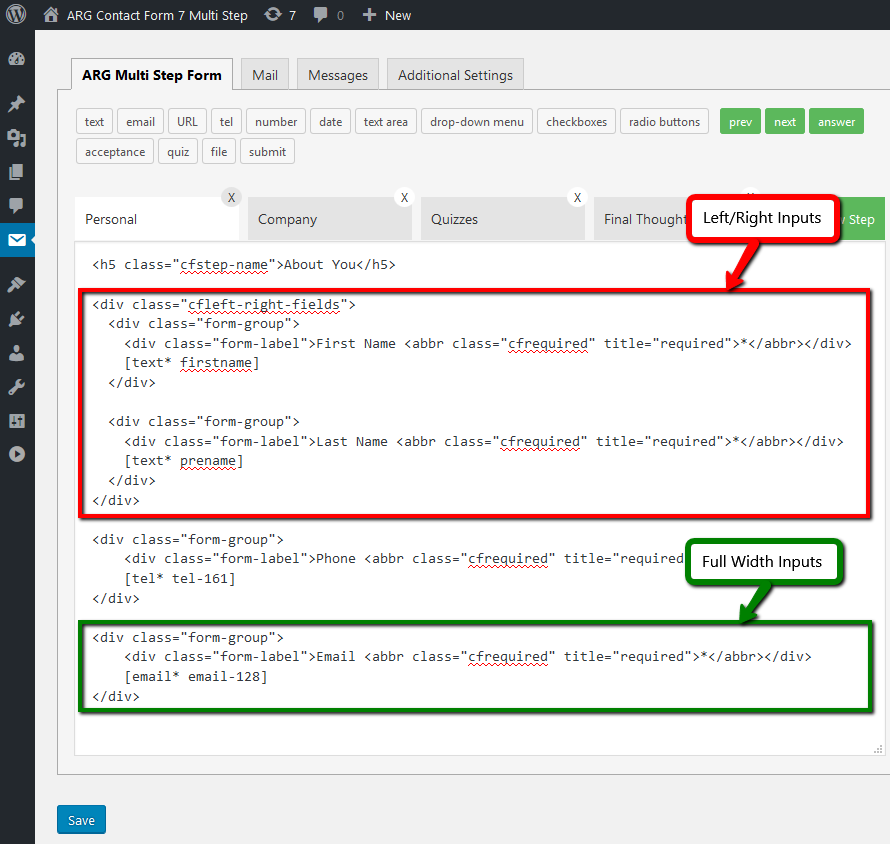
Left/Right Inputs block of code:
|
1 2 3 4 5 6 7 8 9 10 11 |
<div class="cfleft-right-fields"> <div class="form-group"> <div class="form-label">First Name <abbr class="cfrequired" title="required">*</abbr></div> [text* firstname] </div> <div class="form-group"> <div class="form-label">Last Name <abbr class="cfrequired" title="required">*</abbr></div> [text* prename] </div> </div> |
Full Width Inputs block of code:
|
1 2 3 4 |
<div class="form-group"> <div class="form-label">Email <abbr class="cfrequired" title="required">*</abbr></div> [email* email-128] </div> |
After a block of code is copied into a step of your form, edit the label, the required field and the form tag to your needs. If the field is not required, just remove the highlighted html for it:
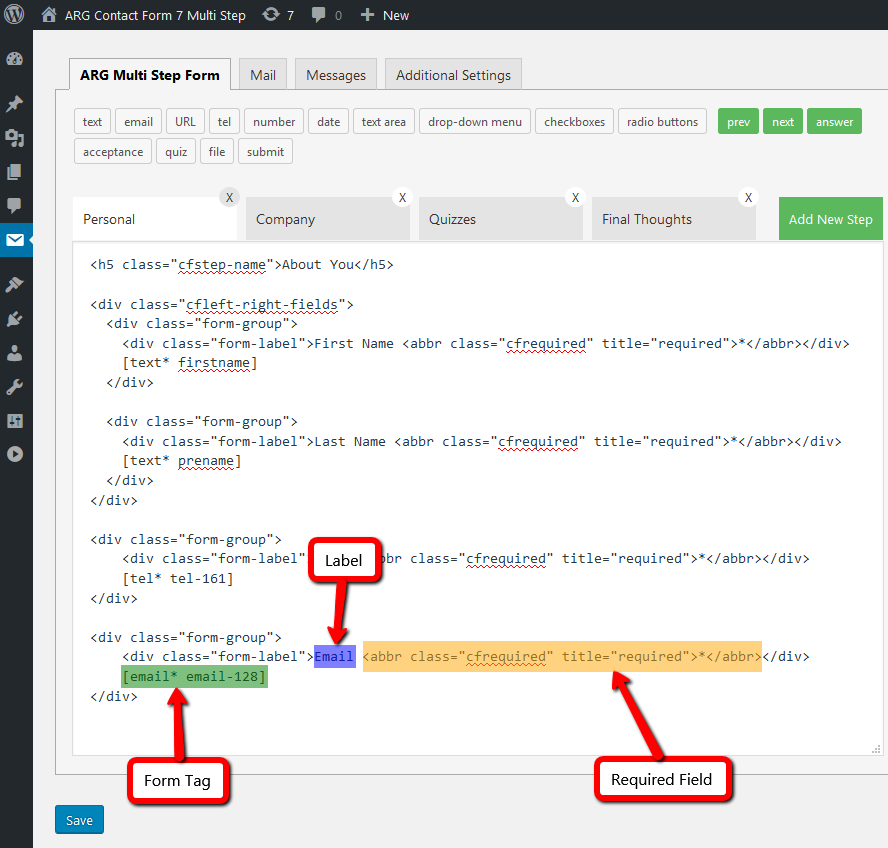
That’s it, don’t forget to save the changes.
Wizard Location
All plugin settings can be found by navigating to Dashboard > Contact > ARG Contact Form 7 Multistep:

Wizard General Settings
Under the General Settings tab you’ll find options like: changing buttons text, custom text, wizard width, secondary font.

Wizard Width and Secondary Font
Here you can find the options to change the wizard width and secondary font:
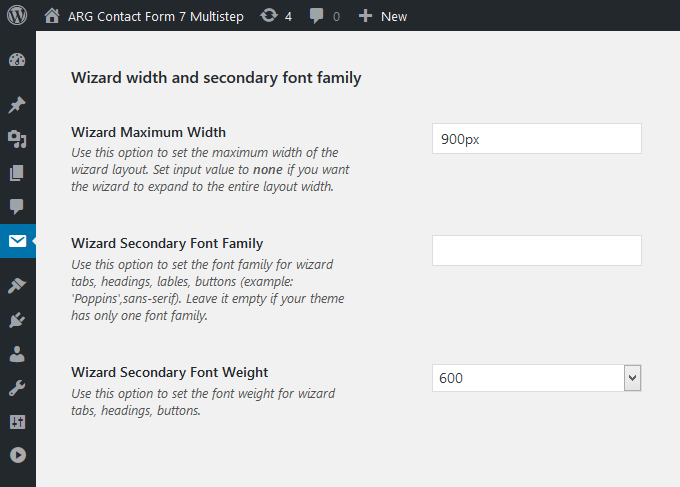
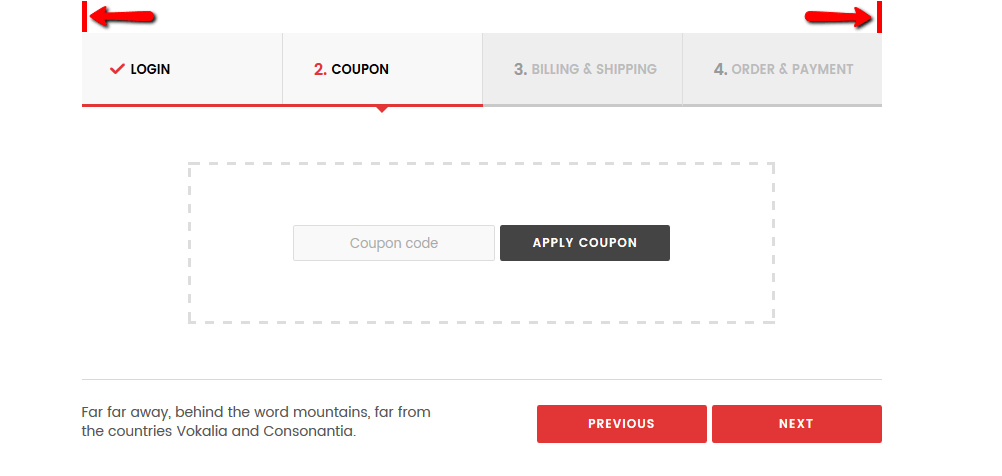
Wizard Maximum Width
Use this option to change the width of the main block which includes all the multistep content. The best part of the option is that you can be pixel specific and change the multistep maximum width to suit your website design.
Wizard Secondary Font Family
The multistep form is built to inherit the fonts you’re using on your website. If the theme you’re using allows you to load more than one font into your website, then you need to use this option to set a specific font that is already loaded. The option works on tabs, headings, labels, buttons, payment method labels.
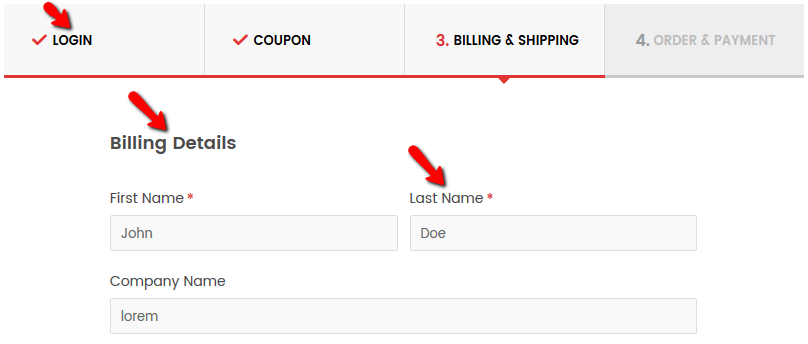
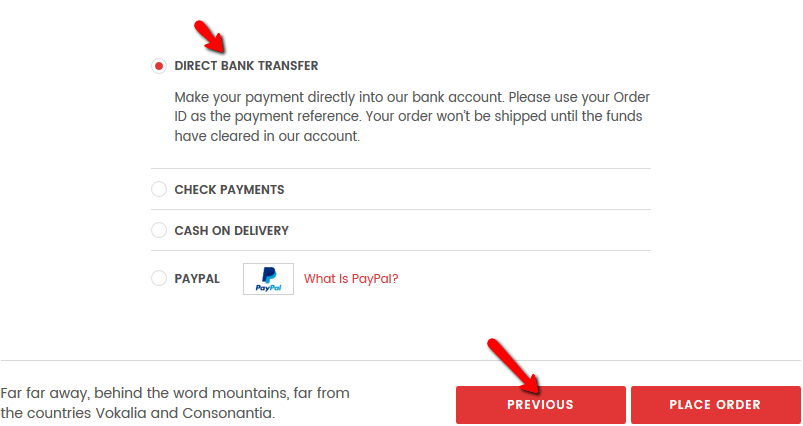
Wizard Secondary Font Weight
Change the font weight for tabs, headings, labels, buttons, payment method labels highlighted above (see screenshot for Wizard Secondary Font Family).
Validation Error Messages
The multistep has a built-in step by step validation so, when you navigate to the next step, all the required fields of the current step are validated. The exceptions are the Login and Coupon steps, because those are separated forms and have their own validation.
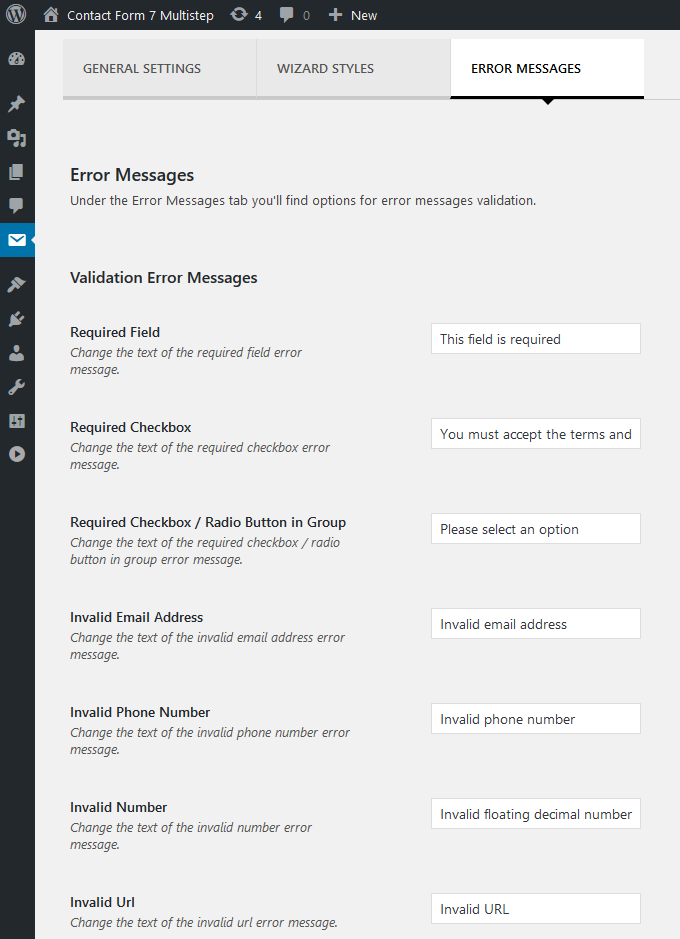
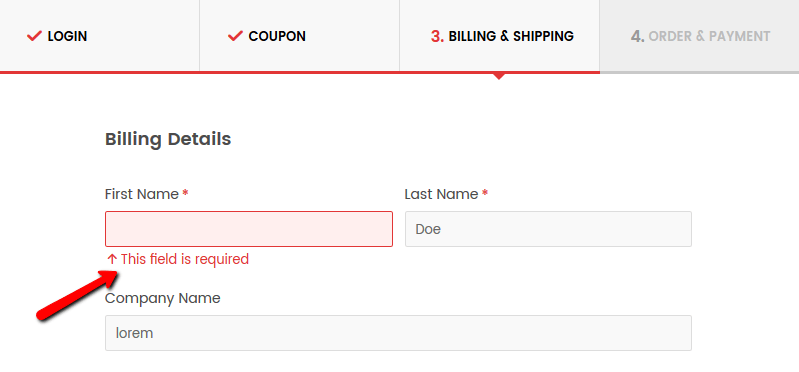
Required Field Message
Some of the form fields need to be completed by the user. You can use this option to change the text of the required field error message.
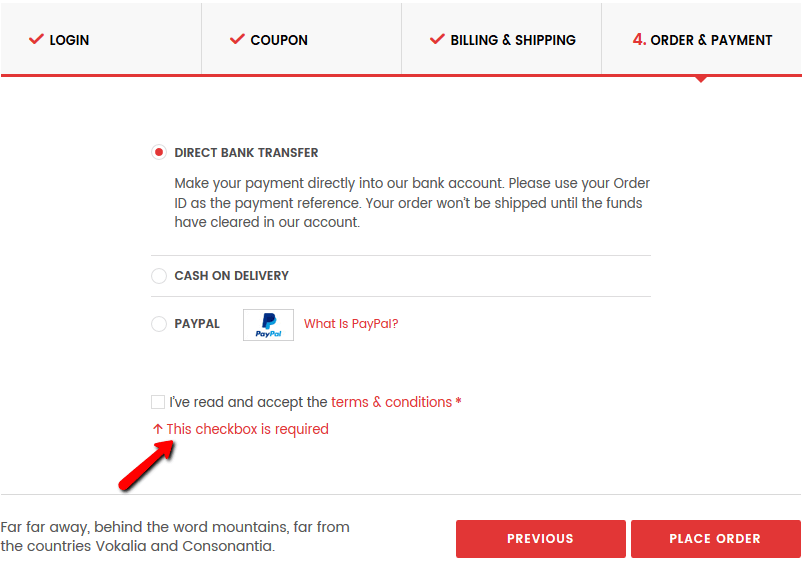
Required Checkbox Message
You can use this option to change the text of the required checkbox error message.
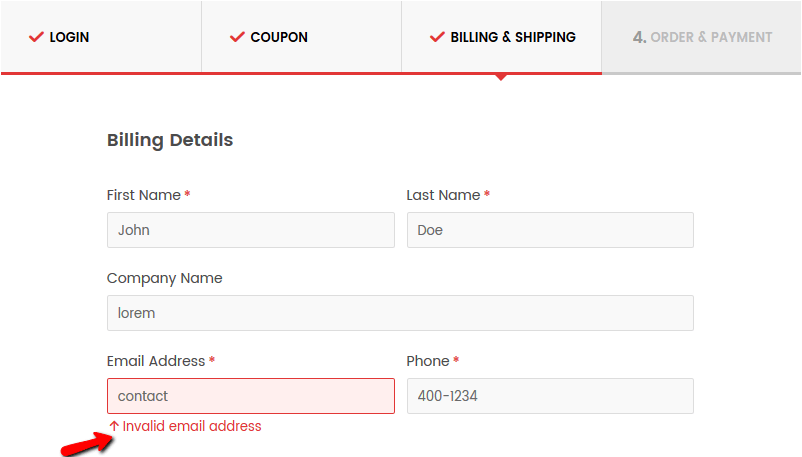
Invalid Email Address Message
The email address field is required, so, to change the text of the invalid email address error message use this option.
Invalid Phone Number
Change the text of the invalid phone number error message.
Invalid Postcode/ZIP
Change the text of the invalid postcode error message.
Wizard Styles
Here you can find the options to change your wizard styles:

Wizard Text Color
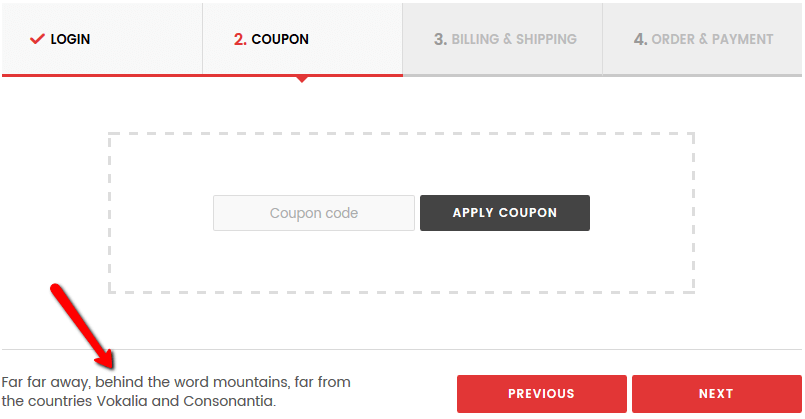
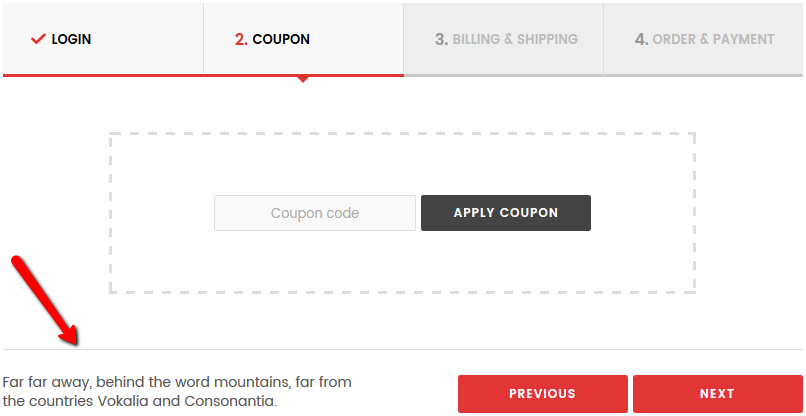
Change the color of wizard footer custom text. This option is useful because you can select a color to highlight an important text.
Wizard Accent Color
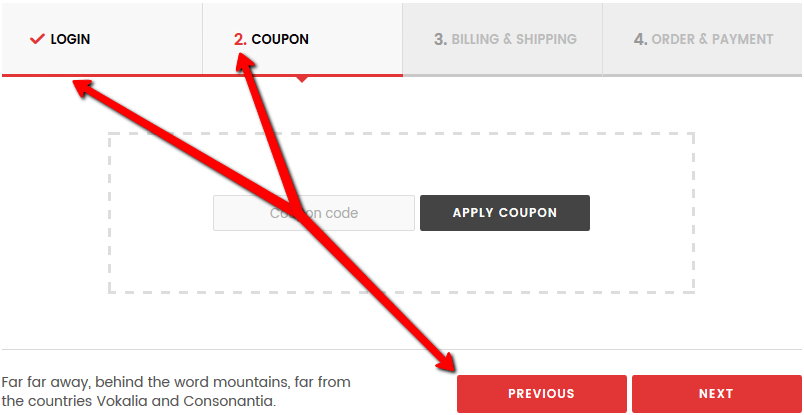
Change the accent color of the wizard. This is a useful option because you can go for the color you decided to mainly use on your website. Check the screenshot below to make an idea of the elements that will change the color once you decide to use it:
Wizard Border Color
Change the color of the wizard footer border line which can be seen between the content section and the footer section. If you don’t need it, you can simply use white color and it will be removed.
Wizard Validation Error Messages Color
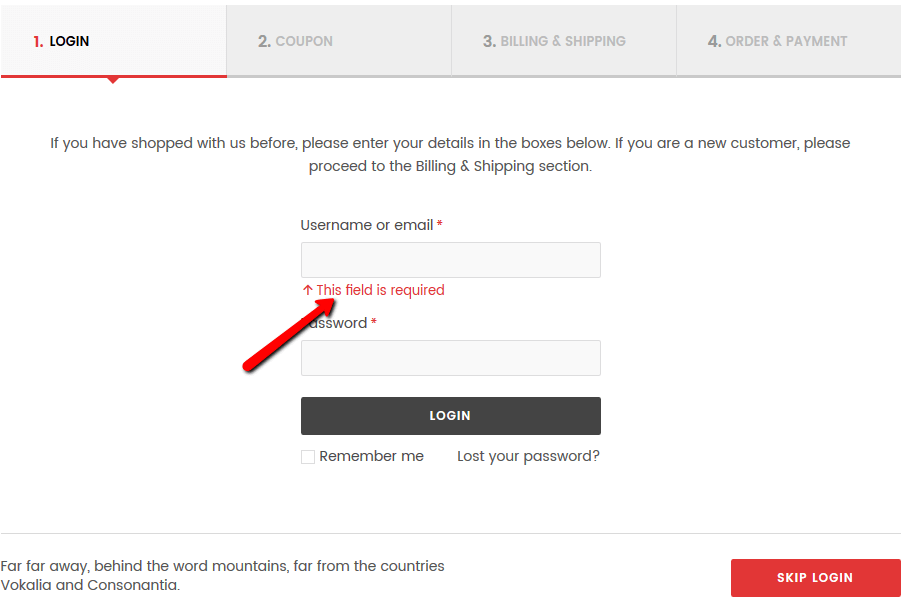
Use this option if you want to change the color of the validation error messages.
Change Wizard Buttons Styles (skip login, next, previous, place order)
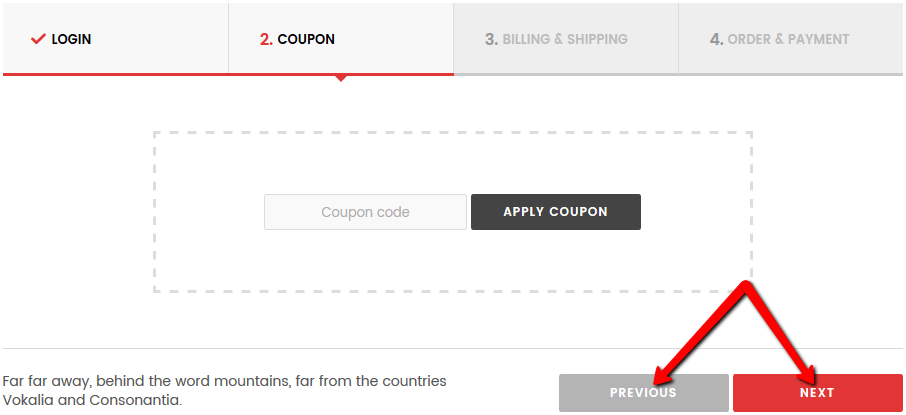
By default your theme buttons styles will be applied. Enable this feature if you want to change the text/background color of these buttons and use the below options:
Wizard Button Text Color
Change the color of the button text.
Wizard Button Text Transparency on Hover
Change the opacity of the text button on hover. The opacity-level describes the transparency-level, where 1 is not transparent at all, 0.5 is 50% see-through, and 0 is completely transparent.
Wizard Next Button Background Color
Change the background color of the next buttons.
Wizard Previous Button Background Color
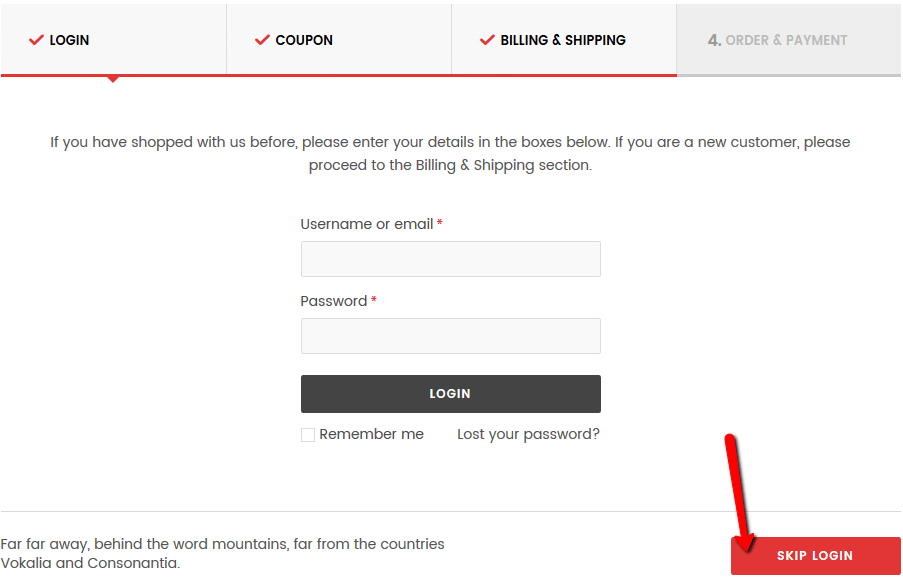
Change the background color of the previous button.
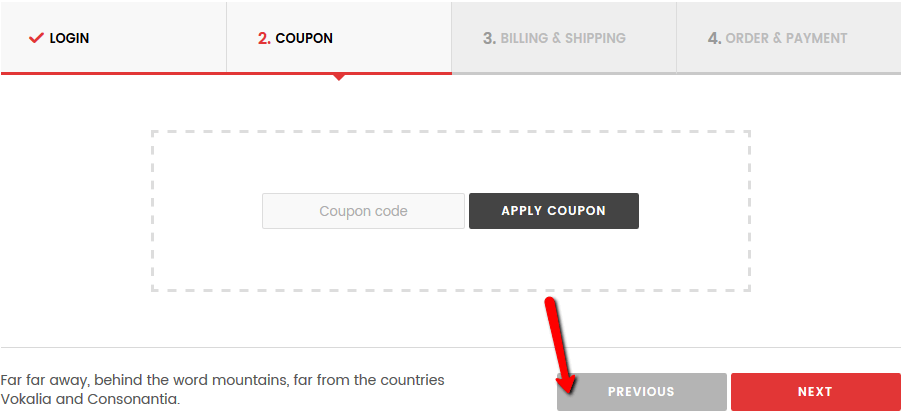
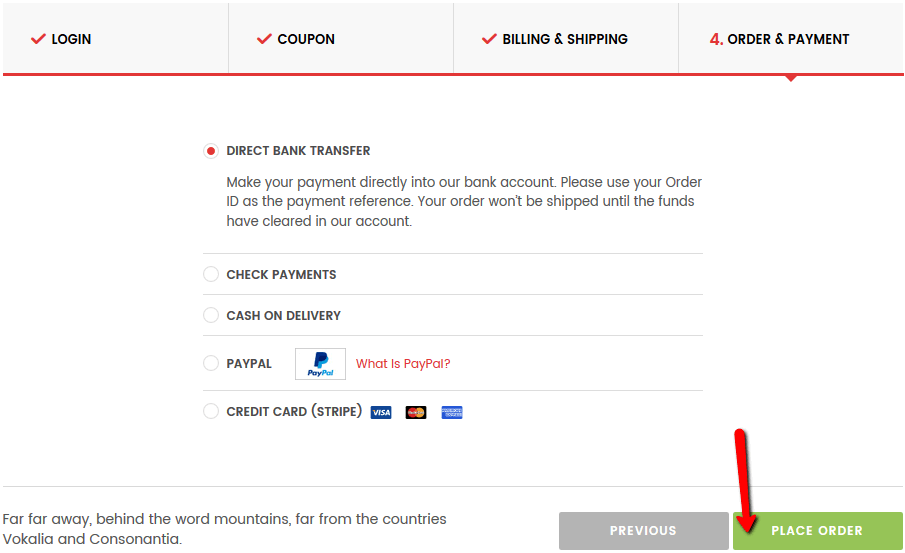
Wizard Send Button Background Color
Change the background color of the send button.
Tab Styles
Here you can find the options to change your tabs styles:
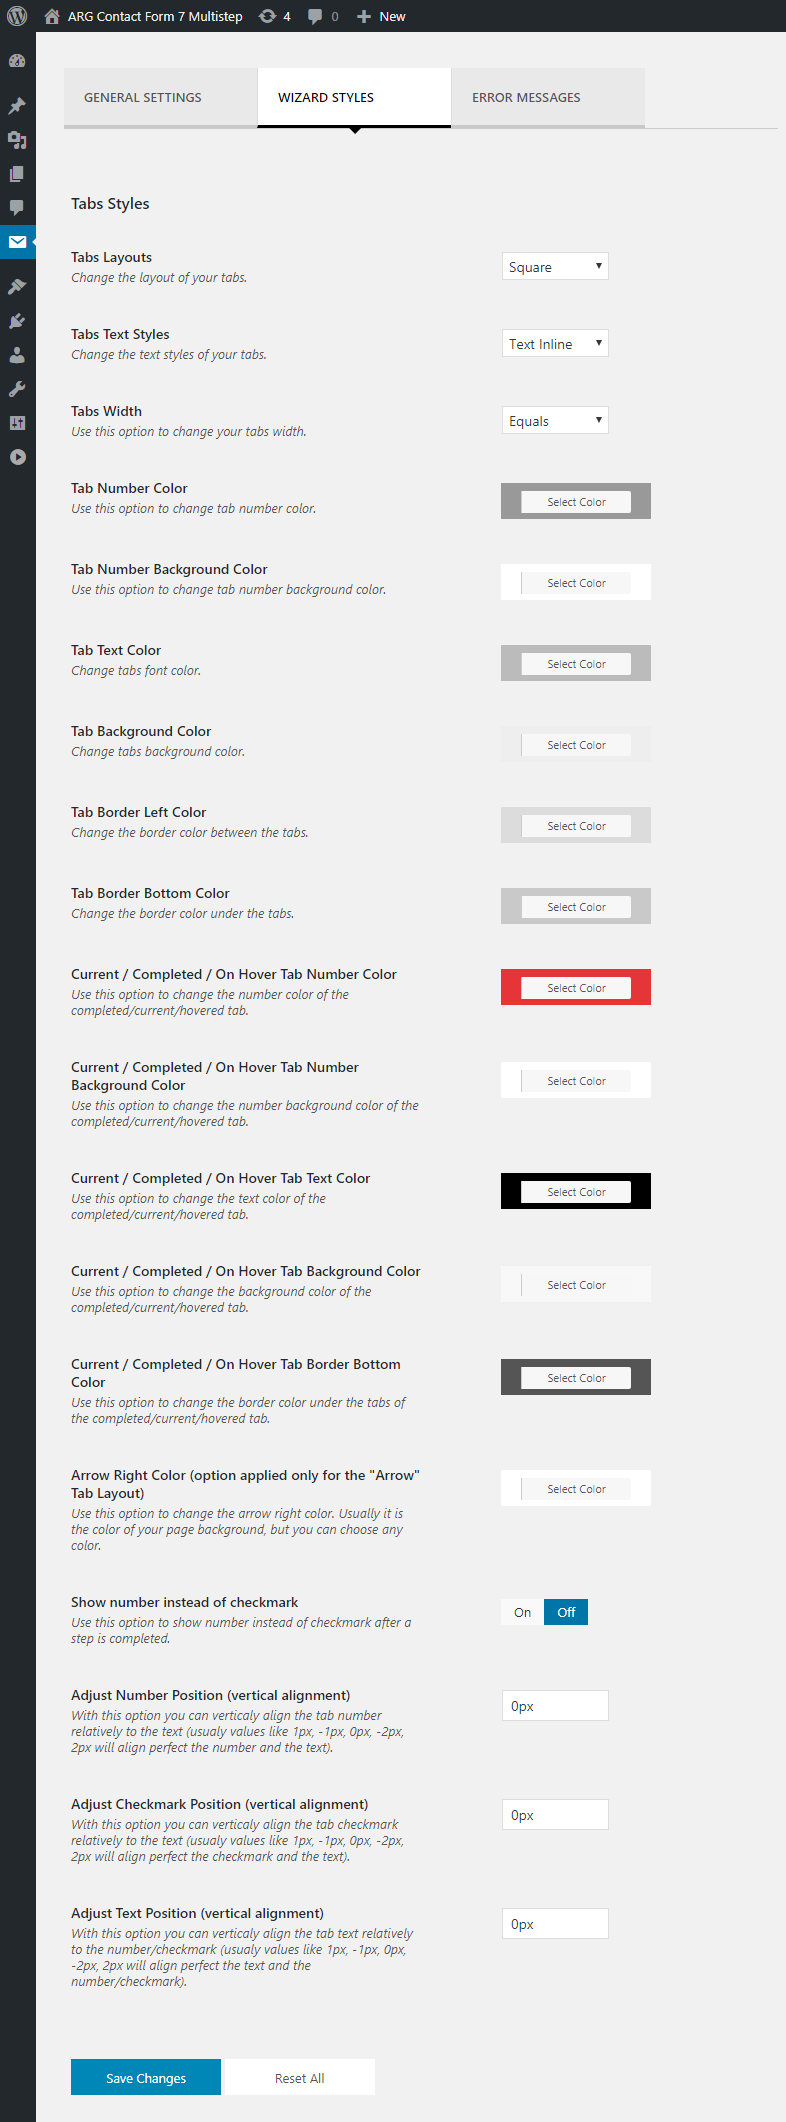
Tabs Layouts
There are two built-in tabs layouts you can choose from: “square” and “arrows”:
Tabs Square Layout

Tabs Arrows Layout

Tabs Arrows Text Styles
There are three built-in tabs text styles you can choose from. Change the text styles of tabs arrows layout using:
Text Inline Template

Text Under Number Template

Hide Number on Tab Template

Tabs Square Text Styles
There are three built-in tabs text styles you can choose from. Change the text styles of tabs square layout using:
Text Inline Template

Text Under Number Template

Hide Number on Tab Template

Tabs Width
You can choose from two built -in options:
Equals

Auto(changes the tabs width depending on the step name)

Tab Number Color
Use this option to change tab number color.

Tab Text Color
You can change the text color of your tabs using this option. Note that the current/completed tab won’t have this text color.

Tab Background Color
You can change the background color of your tabs. Note that the current/completed tab won’t have this background color.

Tab Border Left Color
The multistep tabs are delimited by a fine border, so you can exactly see them. Use this option to change the border color so you can make it more visible or to hide it.

Tab Border Bottom Color
Change the border bottom color of the tabs. Note that the current/completed tab won’t have this border color.

Current / Completed / On Hover Tab Number Color
Use this option to change the number color of the completed/current/hovered tab.

Current / Completed / On Hover Tab Text Color
The current/completed/on hover tabs need to be highlighted for a better user experience. Use this option to change the text color of those specific tabs.

Current / Completed / On Hover Tab Background Color
The current/completed/on hover tabs need to be highlighted for a better user experience. Use this option to change the background color of those specific tabs.

Current / Completed / On Hover Tab Border Bottom Color
Use this option to change the border color under the tabs of the completed/current/hovered tab.

How To
In order to fix/adjust some multistep elements(if necessary) please paste this css code where you can add custom css code in your theme:
***Credits***
jQuery & jQuery Validation Engine
As I said at the beginning, I’d be glad to help you if you have any questions relating to this plugin. No guarantees, but I’ll do my best to assist.
